
Growing pumpkins in containers can be challenging and fun. Children will love the idea of growing pumpkins at home, especially when Halloween is about to come up. This orange globe of a vegetable is rich in Vitamins and minerals yet still has that sweet flavor that children adore.
Not all varieties of pumpkin are suitable for container gardening. Choose Cucurbita Moschata and Cucurbita Pepo for your container garden as they do not produce gigantic pumpkins. The larger the pumpkin, the more soil and ground area it will need for nourishment.
If some people tell you that they tried growing pumpkins in containers but did not succeed, do not be discouraged. They probably neglected to use the appropriate size containers and may have chosen to produce oversized pumpkins relative to the container.
Before You Start Growing Pumpkins in Containers
Choose small varieties of pumpkin for your container gardening. Choose sugar pie pumpkins, Jack-O-Lantern, Connecticut field pumpkin, and Howden biggie varieties when growing pumpkins in pots. These smaller varieties will also need to be supported by a good trellis as the vines are strong enough to support your pumpkins even when not resting on the ground.
You can plan when you want to grow your pumpkins, depending on how long it takes for them to become mature. Mini varieties take about 100 days, while Jack-O-Lanterns take 100-120 days. Choose an area where your pumpkins get full, undisturbed sun. The secret of gigantic Alaskan pumpkins is the long daytime hours that they get during the summer months. If you live in an apartment, choose an area that gets 6 hours of direct sunlight or more.
Make or buy as good, sturdy trellis to support your vines. You have the option of letting your pumpkin grow on the ground, but that would take a lot of floor area. A trellis placed around or near the container would ideal for your pumpkins
Choosing the Right Container to Grow Pumpkins
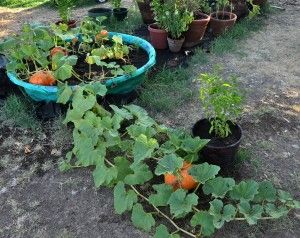
You need an enormous container when growing pumpkins in containers. You need a container that is at least 12 inches high and 4 square feet wide. Raised beds like these work great, however if you would rather make your own, you can use a barrel that is at least 50 gallons split lengthwise at the height of 12 inches. If you do not have a barrel, a plastic kiddie pool will also suffice for your pumpkins.
You can only have two pumpkin plants in one mound per container. Any more and the plants will not have enough room and will fight for water and nutrients.
Drainage is vital for pumpkins. Drill the bottom of your chosen container with a lot of drainage holes to prevent water from pooling inside. You can line the bottom with small pieces of broken terracotta pots, small gravel or stones, or a fiberglass mesh cover to prevent soil erosion. Drill some drainage holes at the sides as well for added measure.
Preparing Your Potting Mix for Growing Pumpkins in Containers
For growing pumpkins in container, you need a potting mixture that has a pH of 6.0-6.8. Do not use regular garden soil as it can contain dormant weed seeds, fungus, and bacteria that can harm your pumpkins.
Buy a potting mix in your local garden store so you can be sure that it has been adequately treated for pot growing. Usually, potting mixes have sterile garden soil, vermiculite, peat moss, or perlite for retaining moisture and nutrients.
Some already come pre-mixed with compost to help your plant grow. Still, you need to put in a reasonable amount of mature compost to nourish the soil. Compost is rich in nitrogen but does not contain harmful chemicals that can harm you or the environment. If compost is not available, 10-20-10 fertilizer given according to package instructions would suffice.
Growing Pumpkins From Seeds
Once you have purchased your seeds, soak them for 8 hours before you plant them. Ideally, seeds for growing pumpkin in containers are planted once outside temperatures reach to 72-75 degrees. This temperature is often achieved during late spring when spring rains have begun to lessen in frequency.
- Create a mound in the center of the container that is 3 feet in diameter with a trench around the edges to help collect water.
- Place five seeds at the center of the mound 6 inches apart in a circular pattern.
- Cover them with an inch of compost and pat it down securely to prevent them from getting eaten by birds.
- Carefully water them with a fine-holed watering can to avoid washing out the covering.
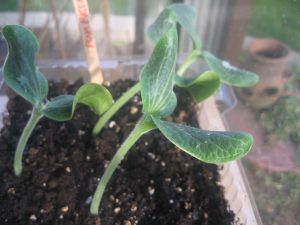
- Once the seeds germinate, thin out the seedlings by pulling them out, leaving behind the 2 of the healthiest seedlings in the mound. 2 seedlings are enough for any more would cause the vines to get tangled, resulting to a poor crop.
Care of Your Container Grown Pumpkins
Keep the soil moist but not as wet as when growing pumpkin in pots. Once your pumpkins form 2-inch vines, carefully coil them around the trellis every day for about 4-7 days until they know how to climb by themselves. Trim off side growths by cutting them to keep your pumpkin patch neat and tidy. Always make sure to keep the soil moist but not wet by watering your plants daily.
Pollinating the Pumpkin Flowers
Eventually, your pumpkin patch will produce male and female flowers. Both can be deceivingly similar, but if you look closely, there are subtle differences you have to note of. Male flowers are always the first to emerge. They sit on thin, long stems and are outnumber female flowers. Female flowers are located a lot closer to the vines and have a fuzzy and round-shaped base to accommodate a developing pumpkin.
Encourage pollination by using a small, soft-bristled artist brush to collect pollen from the males. Distribute the collected pollen on the female flowers in a painting motion and cover the female flower with a small paper bag secured with an elastic band. This way, you do not have to wait for bees or butterflies to come and pollinate your pumpkin patch.
Encouraging Round Pumpkins
Once you see pumpkins develop, handle them as little as possible. You should only give them a little adjusting to help them form a round shape once they become established. Carefully manipulate the pumpkin until the flower end is facing downwards. This is usually done around a month after your pumpkins emerge. Do this by carefully lifting the pumpkin in one hand while supporting the stem and vine with the other. Lift them simultaneously ever so gently and carefully. Place a shingle beneath the pumpkin as you correct its position to protect the skin from touching the soil. Use gloves as pumpkin vines are prickly. Be careful not to injure any vines in the process.
Fertilizing the Container Pumpkins
Side-dress your crops with mature compost or compost manure once a month. Weekly feeding of compost tea is needed as you only have a small area of soil to keep your plant growing.
Pumpkin Plant Pests and Diseases
There are some problems you have to face when growing pumpkins in pots.
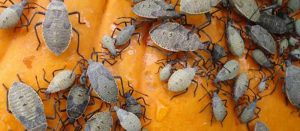
Squash bugs may affect the entire plant. For organically grown crops, pick them out by hand or use neem oil for squash bugs. Use pesticides according to package instructions if you cannot control the infestation. Be sure to use appropriate protective equipment when using pesticides. Give your plants extra protection by spraying your container pumpkin patch with compost tea.
Powdery mildew is also a problem in pumpkin patches. They appear as white, powdery substances that stick on the leaves. Prevent them by watering only the soil and not the leaves. It is also important to rotate your pumpkin patch every year to help prevent this problem
Harvesting Your Pumpkins Grown in Containers
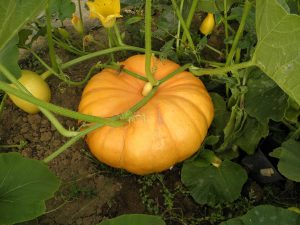
Harvest when the fruit is of deep orange color. Harvest your pumpkins by cutting the stem with a sharp knife, maintaining several inches of stem to keep it fresh. Cure them for ten days beneath the sun and protect during the night with a cover if there is frost forecasted.
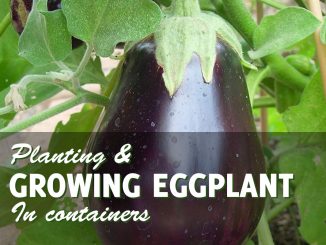
Growing pumpkins in containers need a little bit of patience and extra attention to detail. Once you start off right and maintain your pumpkin patch correctly, you will have a harvest that is far superior in flavor compared to store bought pumpkins. Looking for other vegetables to grow in containers? Check out our article on growing eggplant in containers!
Thanks for this information! I’m growing pumpkins for the first time, and I don’t know what I’m doing.
Ok so i decided to try pumpkin in a kiddie pool my son wanted my pumpkin is huge i picked jack o lantern not smart so i put extra seeds and none were weak i kept them all in there 6 and now that its huge i dont know how to fix they can come out and run the yard what should i do just leave them throw soil and nutrients on lawn ? Plz help
can you grow 1 pumpkin in a 18 gallon pastic tub?